Everyone seems to be baking more that they have more time now that we're staying home now. If you're looking for a new treat to try look no further than these banana, peanut butter, oatmeal cookies.
What You'll Need...
2 Over Ripe Bananas
2 Cups Quick Oats
1/2 Cup Peanut Butter
1 Teaspoon Vanilla
1 Teaspoon Cinnamon
Mash the bananas until liquidy. Add in the rest of the ingredients and combine. You’ll need to mash the stuff together at first.
Once it all comes together scoop out 2 tablespoons of “dough” at a time and form into discs.
Bake at 350 for 15 minutes.
Enjoy!
Wednesday, April 8, 2020
Monday, January 27, 2020
Sweet and Spicy Pizza
All four of us LOVE pizza! If you love pizza, and you love spicy, then this pizza is for you.
What You'll Need...
1 Pizza Crust (1/4 to 1/2 of a homemade pizza dough recipe.)
Panda Express Sweet Chili Sauce
Spicy Cheese (Our favorite is Hot Jalapeno and Habanero Jack)
Your Favorite Spicy Seasoning (We like "Slap Ya Mama" Cajun Seasoning)
Deli Ham (Optional)
Pineapple (Optional)
If you're you want to make your crust from scratch this is our favorite recipe.
Pizza Dough
1 Packet Active Dry Yeast
1 Teaspoon Sugar
1 1/2 Cups Hot Water
2 Tablespoons Olive Oil
3 1/2 Cups All-Purpose Flour
2 Teaspoons Salt
Add the water, sugar and yeast to a mixing bowl and allow the yeast to bloom. Make sure that the water is hot, but not too hot. Too hot or too cold and the yeast won't activate.
Once the yeast has bloomed at the oil, flour, and salt. Mix to combine and then knead until smooth and elastic. This will take at least 5 minutes of kneading.
Coat the mixing bowl with oil or cooking spray, place the bowl back in, and cover with a clean kitchen towel. Allow the dough to rise for at least 1 hour.
When the dough has risen and you're ready to use it punch it down once to get the extra air out and divide the dough into 2, 3, or 4 balls. It all depends on how big you want your pizzas to be.
Pizza
Pre-heat your oven to 450 F
On a greased pizza pan or baking pan press your dough out into your desired pizza shape and thickness. We like a thinner, crispier pizza!
Once the dough is pressed out spread the Sweet Chili Sauce and then later on the cheese. Sprinkle your favorite spicy seasoning on top of the cheese. After the seasoning top the pizza with as much or as little ham and pineapple as you like. This pizza is also great as a spicy cheese or spicy chicken pizza. You can also use your favorite regular pizza cheese as well, but the spicy cheese gives it more of a kick.
Place your pizza in a 450 F oven and allow to bake for 12 - 17. The bake time all depends on how you like your pizza. The longer it stays in the crispier the crust will get!
Remove the pizza from the oven, slice, and enjoy!
Monday, November 25, 2019
Fluffy Pumpkin Pancakes
As
a family we love pancakes! We have them for dinner once or twice a month. I
know what you’re thinking, pancakes for dinner?! We love to have breakfast for
dinner sometimes, and we do it every Friday! So, we have a few different
pancake recipes, and this Fall recipe is perfect for this week! They have a
nice pumpkin flavor and are super light and fluffy.
What
You’ll Need…
1
½ Cup All-Purpose Flour
3
½ Teaspoons Baking Powder
1
Teaspoon Salt
1
Tablespoon Sugar
1
Teaspoon Cinnamon
3
Tablespoon Butter (Melted)
1
¼ Cup Milk
2/3
Cup Pumpkin Puree
Add
flour, baking powder, salt, sugar, and cinnamon to a mixing bowl and whisk to
combine.
Add
the butter, milk, and pumpkin and stir to combine.
Scoop
the batter onto a greased skillet or griddle over medium heat. We prefer our
pancakes to be about 2-3 Tablespoons worth of batter. Allow it to cook until
bubbles start to appear and then flip. Allow the other side to cook through.
Keep the pancakes warm until serving (while the others are cooking) in a 200̊̊
F oven.
Serve
with your favorite pancake toppings. Some of ours are peanut butter, syrup, or cream
cheese icing.
Enjoy!!
Thursday, November 7, 2019
Roasted Butternut Squash
It’s
Fall, and that means fall food! One of my favorite Fall foods is butternut
squash. We love to have roasted squash in burritos, tacos, with eggs or pasta.
Today I have for you my roasted butternut squash recipe.
What
You’ll Need…
1
Butternut Squash
Ground
Cloves
Garlic
Powder or Honey Garlic Rub
Seasoned
Salt
Olive
Oil
Pre-heat
you oven to 425̊ F.
Cut
off the top and bottom of the squash. Lay it on its side and cut it in half to
make it easier to peel.
Peel
the skin from both halves of the squash.
Once
the peel is removed cut the bottom in half and remove the seeds.
Cut
the squash into ½ - 1 inch cubes and spread them out on a greased baking sheet.
Drizzle
the squash with olive oil and spices. Toss the squash gently to make sure that
it is coated with oil and spices.
Bake
at 425̊ F for 30 minutes. After 30 minutes increase the heat to 500̊ F and bake
for an additional 5-8 minutes.
Remove
the squash from the oven and enjoy as part of a taco or burrito, with eggs,
pasta, or salad, or whatever you like!
Monday, October 7, 2019
Pumpkin Bread
It
has been quite some time, but I finally have a new, Fall recipe for you!
For
about a month now Christian has been asking me to make pumpkin bread and
yesterday we finally made some! All of the recipes that I could find had a TON
of sugar in them, so I decided to come up with my own recipe by making some
changes to my banana bread recipe.
Baking
is a science, so making changes to a recipe can be risky – up this one paid
off! The bread is dense, flavorful, and has a delicious fall feel to it!
1
– 15oz Can Pumpkin Puree
3
Cups All Purpose Flour
2
Teaspoons Baking Soda
1
Teaspoon Salt
½
Teaspoon Allspice
½
Teaspoon Pumpkin Pie Spice
2/3
Cup Sugar
2/3
Cup Butter (Melted)
2
Eggs (Or 3 Tablespoons Sour Cream)
Preheat
your oven to 350.
In
a medium mixing bowl add the can of pumpkin and the sour cream (or eggs), and
mix well. Once the eggs or sour cream are incorporated add in the melted butter
and sugar, and mix until combined.
In
a separate bowl combine the flour, baking soda, salt, and spices.
Add
half of the dry mix to the pumpkin mixture and mix until it comes together
before adding the second half.
Be
sure to mix well, scraping the bottom of the bowl to ensure that all of the dry
mix is incorporated.
Divide
the batter evenly between into two greased loaf pans, and smooth it out so that
it isn’t just a mound in the middle of the pan.
Bake
at 350 for 50 minutes.
Allow
the loaf to cool slightly before removing from the pan and cooling completely
on a cooling rack
Slice
and enjoy! .
Friday, May 31, 2019
Buckeyes
One of my favorite flavor combinations in the whole world is peanut butter and chocolate. Reese's Peanut Butter cups are my favorite candy, and these buckeyes are just homemade peanut butter balls. Yum!
What You'll Need...
1 Cup Creamy Peanut Butter (Or other nut butter, or Sunbutter)
1/4 Cup Butter (Softened)
1 Tablespoon Brown Sugar
1 Teaspoon Vanilla
1 1/2 Cups + 2 Tablespoons Powdered Sugar
8oz Chocolate Chips or Melting Chocolate
In a mixing bowl combine the butter and peanut butter. You can use a hand or stand mixer, but I prefer to mix them by hand.
Add the sugars and vanilla to the peanut butter mixture and mix until combined. This is where doing it by hand makes the most sense for me. You will need to use your hands to make the mixture come completely together.
Once the peanut butter mixture is completely combined form them into balls and place them on a tray. I like to make mine using about 1/2 Tablespoon of peanut butter mixture at a time. The last time I made these (last weekend) I weighed each one using my kitchen scale. 9g per ball was the perfect amount.
Once you have all of the balls formed place the tray in the freezer for at least 15 minutes. Before removing them from the freezer melt the chocolate in the microwave in a deep, skinny microwave safe bowl or mug.
Remove the peanut butter balls from the freezer and using a toothpick dip them in the chocolate so that they are 3/4 of the way covered.
Be careful, the peanut butter will start to soften, so you will need to refreeze the entire batch at times. I find that I can get 10-15 balls dipped before I need to refreeze.
Once they are all dipped all to set and then serve! Store in an airtight container in the refrigerator.
What You'll Need...
1 Cup Creamy Peanut Butter (Or other nut butter, or Sunbutter)
1/4 Cup Butter (Softened)
1 Tablespoon Brown Sugar
1 Teaspoon Vanilla
1 1/2 Cups + 2 Tablespoons Powdered Sugar
8oz Chocolate Chips or Melting Chocolate
In a mixing bowl combine the butter and peanut butter. You can use a hand or stand mixer, but I prefer to mix them by hand.
Add the sugars and vanilla to the peanut butter mixture and mix until combined. This is where doing it by hand makes the most sense for me. You will need to use your hands to make the mixture come completely together.
Once the peanut butter mixture is completely combined form them into balls and place them on a tray. I like to make mine using about 1/2 Tablespoon of peanut butter mixture at a time. The last time I made these (last weekend) I weighed each one using my kitchen scale. 9g per ball was the perfect amount.
Once you have all of the balls formed place the tray in the freezer for at least 15 minutes. Before removing them from the freezer melt the chocolate in the microwave in a deep, skinny microwave safe bowl or mug.
Remove the peanut butter balls from the freezer and using a toothpick dip them in the chocolate so that they are 3/4 of the way covered.
Be careful, the peanut butter will start to soften, so you will need to refreeze the entire batch at times. I find that I can get 10-15 balls dipped before I need to refreeze.
Once they are all dipped all to set and then serve! Store in an airtight container in the refrigerator.
Friday, April 26, 2019
Cabbage Bowls
Last
month we had some cabbage left over after St. Patrick’s Day and I wanted to do
something with it besides make coleslaw. I had an idea and I went with it – it
has become one of my new favorite things to make and to eat! The measurements
in this recipe are in grams for the vegetables and ounces or even cups for
other goodies. If you’re not looking for accurate measurements for calorie
counting purposes you can eyeball the amount, however, a kitchen scale is a
great tool to have. (We gave in and bought one the fall and use it multiple
times a day. Definitely worth the ~$20 spent.
What
You’ll Need…
Cabbage
[Chopped] (200g per person)
Spices
(Your favorites)
¼
Cup Water
Mix
and Match Add Ins: (The amounts for these depend on what you like and how many
people the dish is being made for.)
Onions
(100 – 200g)
Zucchini
(150 – 300g)
Bell
Pepper (100 – 200g)
½
Cup Peas
3
– 8oz Meat of your Choice Cut into Bite Sized Pieces [Pork, Beef, Chicken,
Sausage, etc.] (Per person)
1
Serving Cooked Pasta
½
- 1 Cup Cooked Rice
Your
Favorite Sauce
Start
out by measuring out and chopping your chosen vegetables. Add the chopped
cabbage to a deep 10in skillet along with the water. Cover the pan and allow to
cook over medium-low heat for 10 minutes. Mix twice to avoid sticking.
After
10 minutes add in your additional vegetables and your chosen spices. Cover
again and allow to cook for at least an additional 10 minutes. Mix twice to
avoid sticking. The longer you let everything cook the softer it will be.
While
the vegetables are cooking prefer your additional items like meats, starches,
and sauces.
Once
the vegetables are cooked to your liking remove them from the heat and divide
evenly for the number of people to be served. Add in your extras (meat, starch,
and sauce) and mix to combine.
Enjoy!
Our
current favorite combination is cabbage, peas, zucchini, red bell pepper,
chicken, rice, sour cream and barbecue sauce.
Tuesday, March 12, 2019
Soda Bread
It
has been quite some time since we shared a recipe, and I hope that now that I
am done with school that I can find the time to share something tasty with you
once a month.
St.
Patrick’s Day is this weekend and I don’t know about you, but I LOVE Irish
food. Traditional Irish Soda Bread doesn’t have any dried fruits or anything in
it, but this version is quite good. So, today I give you my take on Soda Bread.
This recipe is based on Ina Garten’s.
What
You’ll Need…
4
Cups All Purpose Flour
4
Tablespoons Sugar
1
Teaspoon Baking Soda
1
½ Teaspoons Salt
4
Tablespoons Cold Butter (Cut into cubes)
1
¾ Cup Buttermilk
1
Egg
½
Cup Raisins
½
Cup Dried Cranberries
Preheat
your oven to 375.
Place
parchment paper onto a baking sheet. A well-greased pan or non-stick foil on a
baking sheet will work, too.
Combine
the flour, sugar, baking soda, and salt in the bowl and mix with a hand or
stand-mixer. While mixing on low add the cubes of butter and mix until the
butter is mixed in.
With
a fork lightly beat together the buttermilk and egg, With the mixer on low
speed, slowly add the buttermilk mixture to the flour mixture.
Combine
the dried fruit with a tablespoon of flour so that they don’t all sink to the
bottom and mix them into the dough. Don’t worry, the dough will be wet.
Dumped
the dough out onto a flour cutting board or counter and knead it into a rounded
loaf.
Place
the loaf onto the prepared baking sheet and using a bread knife cut an X into
the top of the loaf.
Bake
for 45 – 55 minutes. It will sound hollow when it is done.
Cool
on a wire rack.
Serve
warm, at room temperature, or cold – plain, with butter, or with jelly. There
really is no wrong way to eat this bread.
Enjoy!
Saturday, December 22, 2018
Peppermint Bark
Things
have been crazy lately, and for that I apologize. The good news is that we’re
only a few days away from Christmas and I have the perfect simple and delicious
recipe for you to enjoy the Christmas.
What
You’ll Need…
1
White Chocolate Melting Wafers
2
Peppermint Candy Canes
Line
a baking sheet with parchment paper or a silicone mat.
Place
the unwrapped candy canes in a zip-top bag and break into pieces using a
rolling pin.
Place
the melting wafers in a microwave safe bowl and microwave for 20 seconds. Stir
the chocolate, if it’s not melted all the way microwave again in 10 second
increments, stirring in between.
Once
the chocolate is fully melted spread it evenly on the parchment or sil-mat and
sprinkle the peppermint pieces on top.
Allow
the chocolate to set fully before breaking into pieces.
Enjoy!
Tuesday, July 24, 2018
Bacon Cheeseburger Casserole
It
has been FOREVER since I last shared a recipe – or at least it feels that way.
This got crazy busy for a few months, but now that I have a short break from
school I can finally share a delicious recipe with you!
Today
we have for you a delicious, protein packed new take on the cheeseburger.
What
You’ll Need…
2lbs
Ground Meat
1
Large Russet Potato
2
Tablespoons Ketchup
2
Heaping Tablespoons Mayonnaise
4
Slices Bacon
Cheese
Your
Favorite Seasoning
Start
off by cooking the ground meat all of the way through, adding your favorite
seasoning to the meat as it cooks.
In
a separate pan, or the oven, cook the bacon until slightly crisp.
While
the meat is cooking, using a mandolin or a very sharp knife thinly slice the
potato. In an air fryer, or the oven cook the potatoes slightly. In an air
fryer this will take about 7 minutes at 400. In the oven it should take about
the same amount of time.
.
Next,
in a small bowl combine the ketchup and mayonnaise.
Now
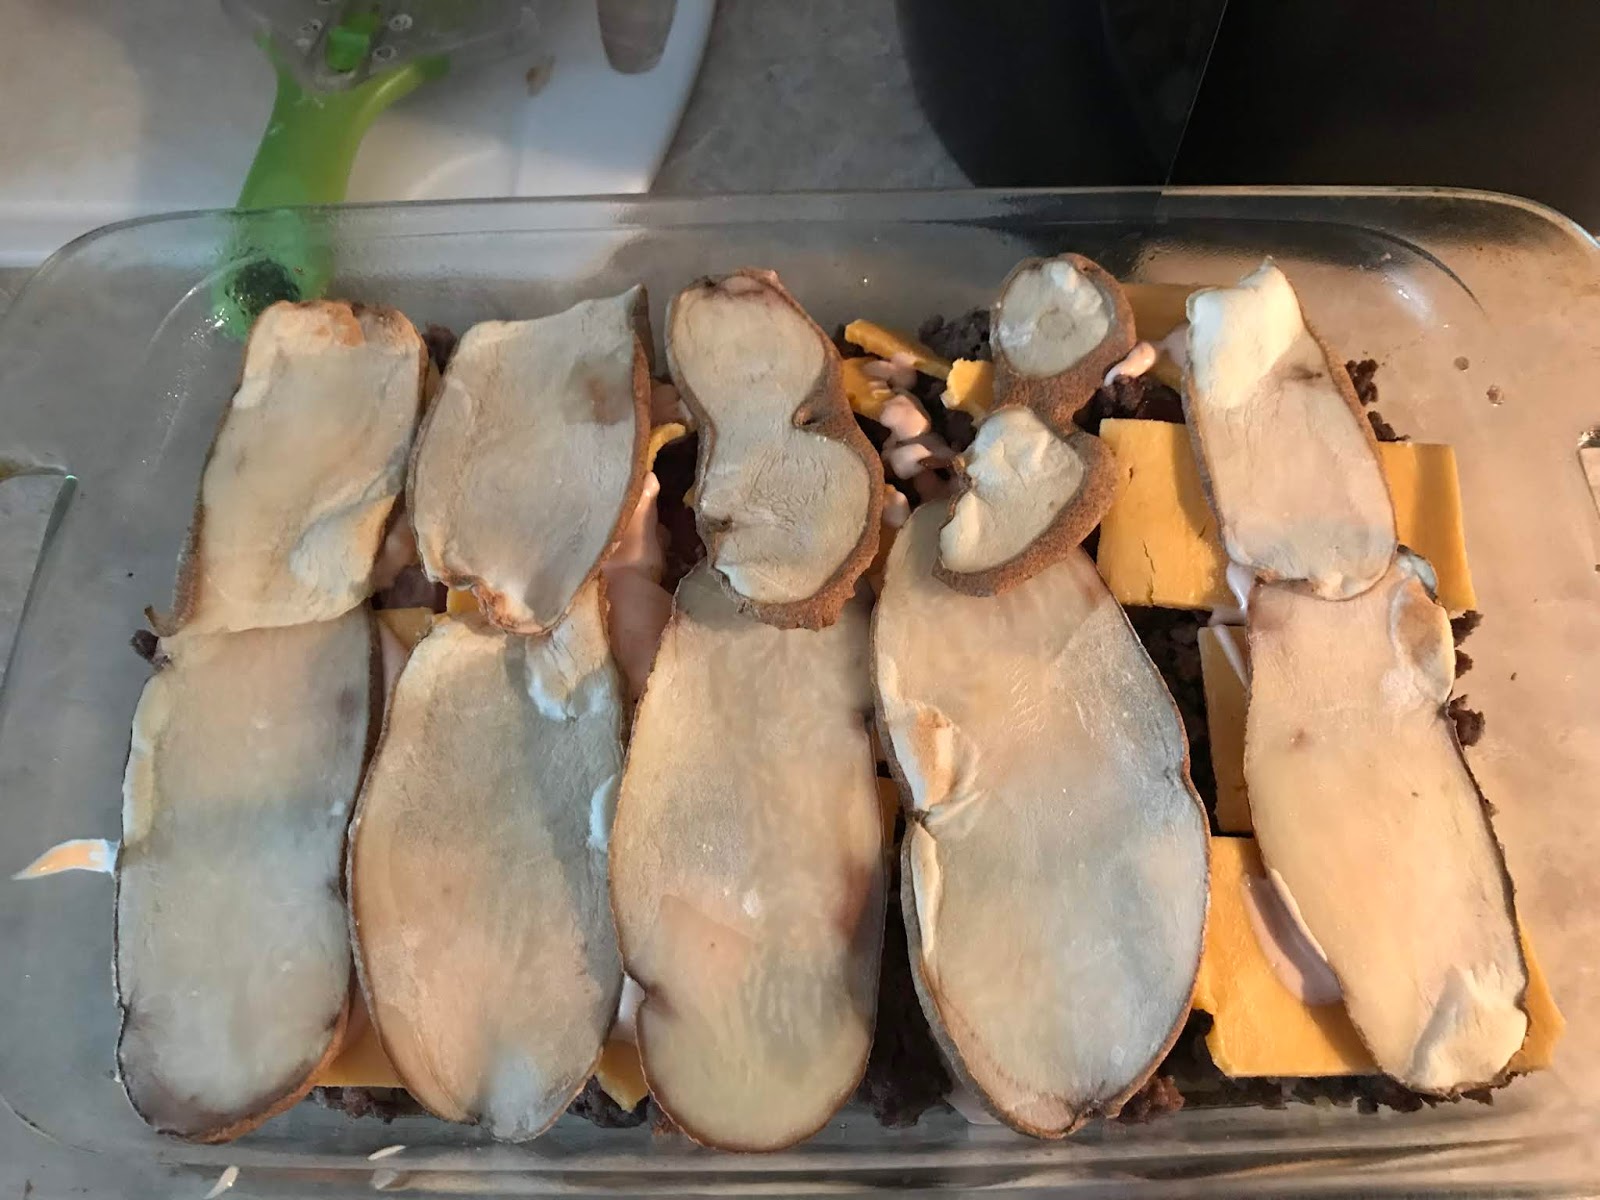
it’s time to build the casserole! In a greased 9x13” pan lay down a layer of
potatoes.
Spread layer of the ketchup and mayo mixture over top. Next add
all of the ground meat in an even layer and top that with the slices of bacon.
Top the meat with as much or as little cheese as you like – this can be any
cheese you like. We recommend a good amount of cheese. Drizzle on the remaining
ketchup/mayo mixture. Cover everything with another layer of potato slices.
Top that with some more cheese.
Bake
at 350 for 30 minutes
Enjoy!
Wednesday, March 28, 2018
Chocolate Waffles
Here
at the Whitaker house we love to have breakfast for dinner every once in a
while, and that normally means waffles or pancakes if Christian has a say in
the matter. Waffles and pancakes are great, and there are so many different
ways to prepare them. Plain, blueberry, chocolate chip, topped with fruit or
peanut butter or cream cheese frosting. Yum!
Recently
we added a new option to our list, chocolate waffles! You should try them out,
you’ll be hooked.
What
You’ll Need…
1
½ Cups All Purpose Flour
3
½ Teaspoons Baking Powder
1
Teaspoon Salt
¼
Cup Sugar
¼
Cup Unsweetened Cocoa Powder
3
Tablespoons Butter (Melted)
1
¼ Cup Milk
1
Egg
1
Teaspoon Vanilla Extract
Add
the flour, baking powder, salt, sugar and cocoa powder to a mixing bowl and
whisk to combine.
Add
in the melted butter, milk, egg and vanilla to the dry ingredients and mix
until just combined.
Add
your desired amount of batter to a pre-heated waffle iron and cook until done.
Serve
the waffles on their own or with your favorite toppings!
Tuesday, March 13, 2018
Creamy Crockpot Chicken "Casserole"
This
meal is easy and delicious.
What
You’ll Need…
4
Chicken Thighs
1
Can Cream of Mushroom Soup
3
Large Carrots (Peeled and Chopped)
1
Cup Chicken Broth
1
Cup Frozen Peas
4oz
Cream Cheese
Seasoned
Salt
Pepper
Add
the chicken, even from frozen, to your crockpot.
Add
the remaining ingredients over the chicken. For the cream cheese, break it up
into chunks and sprinkle it throughout the crockpot.
Turn
the crockpot to low and allow it to cook for 8 hours.
Serve
alone, with pasta, rice or garlic bread! Enjoy!
Friday, March 2, 2018
Cheesy Potato Soup
It
has been quite some time since we post a recipe, and for that I apologize!
Today we have something that is warm and comforting!
What
You’ll Need…
3
– 3.5lbs potatoes
1
(32oz) Box Chicken Broth
2
Cups Water
1.5
Cups Sour Cream
1
Cup Shredded Cheese (Your Choice)
Pepper
Seasoned
Salt
Paprika
Start
out by washing and peeling your potatoes.
Cut
the potatoes into 1-2 inch cubes and add to your crockpot along with the broth
and water. Allow the potatoes to cook on low for three hours.
Carefully
remove the potatoes from the crockpot and blend until smooth. This should be
done in batches. Be careful, blending hot items can be dangerous.
Add
the potato mixture back into the crockpot, add the remaining ingredients and
stir until combined.
Allow
the soup to cook on low for another four hours.
Serve
alone or topped with more cheese, sour cream and bacon.
Enjoy!
Tuesday, December 19, 2017
Butternut Squash Ravioli
I finally have a new recipe for you! If you like butternut squash, or even if you don't this recipe is for you! When I was making the puree Christian told me that he didn't want to try it because he didn't like squash - he loved the pasta, though.
These ravioli are a delicious combination of sweet and savory, and are delicious.
What You'll Need..
1 3 - 3.5lb Butternut Squash (peeled and cubed)
1/4 - 1/2 Cup Broth (chicken, beef or veggie)
1/2 Cup Sour Cream
1/2 Cup Honey
Black pepper (to taste)
2 Teaspoons Honey Garlic Spice Rub
Olive Oil
Pasta sheets, wonton wrappers or fresh pasta
Butter
Peel and cube the squash. Place in an even layer on a greased baking sheet. Drizzle with olive oil. Roast at 400 for 45 minutes.
Allow the squash to cool before adding it, the sour cream, honey, broth, pepper and honey garlic rub to the blender. Blend until smooth.
Make the ravioli by adding 1-1 1/2 tablespoons of squash puree to a wonton wrapper or pasta sheet. If using a wonton put water on the edges and place another wrapper on top. Use a fork to crimp the edges closed.
Add the ravioli to boiling water until they float to the top, less than 1 minute.
Finish the ravioli in a skillet with melted better and additional honey garlic rub.
Serve topped with grated cheese.
1/2 Cup Sour Cream
1/2 Cup Honey
Black pepper (to taste)
2 Teaspoons Honey Garlic Spice Rub
Olive Oil
Pasta sheets, wonton wrappers or fresh pasta
Butter
Peel and cube the squash. Place in an even layer on a greased baking sheet. Drizzle with olive oil. Roast at 400 for 45 minutes.
Allow the squash to cool before adding it, the sour cream, honey, broth, pepper and honey garlic rub to the blender. Blend until smooth.
Make the ravioli by adding 1-1 1/2 tablespoons of squash puree to a wonton wrapper or pasta sheet. If using a wonton put water on the edges and place another wrapper on top. Use a fork to crimp the edges closed.
Add the ravioli to boiling water until they float to the top, less than 1 minute.
Finish the ravioli in a skillet with melted better and additional honey garlic rub.
Serve topped with grated cheese.
Wednesday, November 8, 2017
Warm Brussel Sprout and Corn Slaw
It
has been way too long again, I know. I cannot apologize enough – life is crazy,
but I should be able to post more than once every two months. I don’t want to
make any promises, though, because I don’t want to end up breaking them.
Today
we have for you a way to make Brussel sprouts taste good! Brussel sprouts? I
know, not a favorite vegetable for a lot of people, but if you cook them right
they are actually really good. There are a few great ways to cook them, but
today we’re only going to talk about one – Brussel sprout and corn slaw.
What
You’ll Need…
½
Tablespoon Olive Oil
7-10
Medium Brussel Sprouts
½
Cup Frozen Corn
Salt
Pepper
Cut
each Brussel sprout in half leaving the bottom end on, this helps to keep it
together while you’re cutting it.
Slice
each half into thin ribbons.
Heat
the olive oil in a skillet over medium-low heat. Once it is hot add the Brussel
sprouts and allow them to start to soften. Stir occasionally.
After
about 3-5 add the frozen corn and allow it to thaw.
Add
the salt and pepper, to taste and stir through the mixture.
Once
the corn is thawed and heated through and the sprouts have a bit of good char
to them the dish is done.
Enjoy!
Tuesday, September 19, 2017
Fruit Cobbler Topping
It
has been quite some time since I last posted a recipe, and for that I
apologize. Life has been crazy lately. I think everyone can say that, though,
right?
A
couple of weeks ago we got some fresh peaches and made delicious peach cobbler!
I wanted a topping that was soft, sweet and simple! I came up with this recipe
that went great over the peaches, but it would be great over apples or any
other fruit as well.
What
You’ll Need…
1
Stick Very Cold Butter (Cubed)
1
½ Cup All Purpose Flour
2
Teaspoons Baking Powder
1
Teaspoon Salt
¾
Cup Milk
1
Cup Brown Sugar
1
½ - 2 Tablespoons White Sugar
Combine
the flour, baking powder, salt and brown sugar in a medium mixing bowl.
Using
a fork or pastry cutter cut the cold butter into the dry ingredients until the
butter is throughout the mixture, but still in small chunks.
Add
the milk and mix until combined.
Plop
the mixture on top of whatever fruit mixture you’re using until covered.
Sprinkle
the white sugar evenly over the top of the topping.
Bake
at 350 for 30 minutes – until a toothpick comes out cleanly.
Enjoy!
Tuesday, July 18, 2017
Peach Ketchup
A
few years ago we made peach barbecue sauce and it was amazing! So a few weeks
ago we had some fresh peaches and tomatoes that we didn’t want to go bad, so we
had to use them. How do you use both tomatoes and peaches in the same recipe,
though? The answer, peach ketchup!
What
You’ll Need…
3
Large Tomatoes
3
Large (5-6 small) Peaches
2
Tablespoons Vinegar
2
Tablespoons Sugar
1/2
Teaspoon Salt
2
Teaspoons Corn Starch
Start
out by dicing the tomatoes and the peaches.
Place
all of the ingredients, except the corn starch, in a 3-quart pot and place on
the stove over medium-low heat.
Allow
the mixture to cook for about 20 minutes, or until the peaches and tomatoes are
soft.
Carefully
transfer everything from the pot to your blender and blend until smooth.
The
sauce will be thin, and that is what the corn starch is for! Pour the sauce
back into the pot, place it back on the heat and add the corn starch. Whisk
until incorporated.
Allow
the sauce to cook and thicken for about 10 more minutes.
Cool
slightly and serve with everything you would serve with regular ketchup!
Friday, July 7, 2017
Texican Lasagna
It
has been FOREVER since I lasted posted a recipe and for that I apologize! Life
has been crazy busy lately, well for the last few months. Today, though, I
finally have a new delicious item for you and I hope that I can get back on
track and share at least once a month, if not more.
Today
we have for you Texican Lasagna – yes, you read that right. This is a Tex-Mex
Lasagna and it is delicious!
What
You’ll Need…
1
Package Oven Ready Lasagna Noodles
1lb
Ground Meat (Beef, Turkey, Chicken, etc.)
1
½ - 2 Cups Salsa (Your favorite kind)
1
Cup Sour Cream
2
Cups Shredded Cheese (Mexican Blend works best, but anything will taste good.)
1
½ - 2 Cups Frozen or Fresh Corn
Seasoned
Salt
Preheat
your oven to 375.
Cook
the ground meat and season with seasoned salt.
Place
a thin layer of salsa on the bottom of a well-greased 9x13 pan.
Follow
that up with a layer of lasagna noodles, another layer of salsa, a layer of ground
meat, a layer of corn, a layer of sour cream and a layer of cheese.
Place
another layer of noodles on top of the cheese and repeat the salsa, meat, corn,
sour cream and cheese layers.
Top
the second layer of cheese with a layer of noodles and cover that with a thin
layer of salsa.
Cover
the pan with foil and bake at 375 for 45 minutes. Uncover and bake for an
additional 15 minutes.
Allow
to rest for a few minutes after removing from the oven so that it doesn’t fall
apart as much.
Serve
and enjoy!
Friday, April 7, 2017
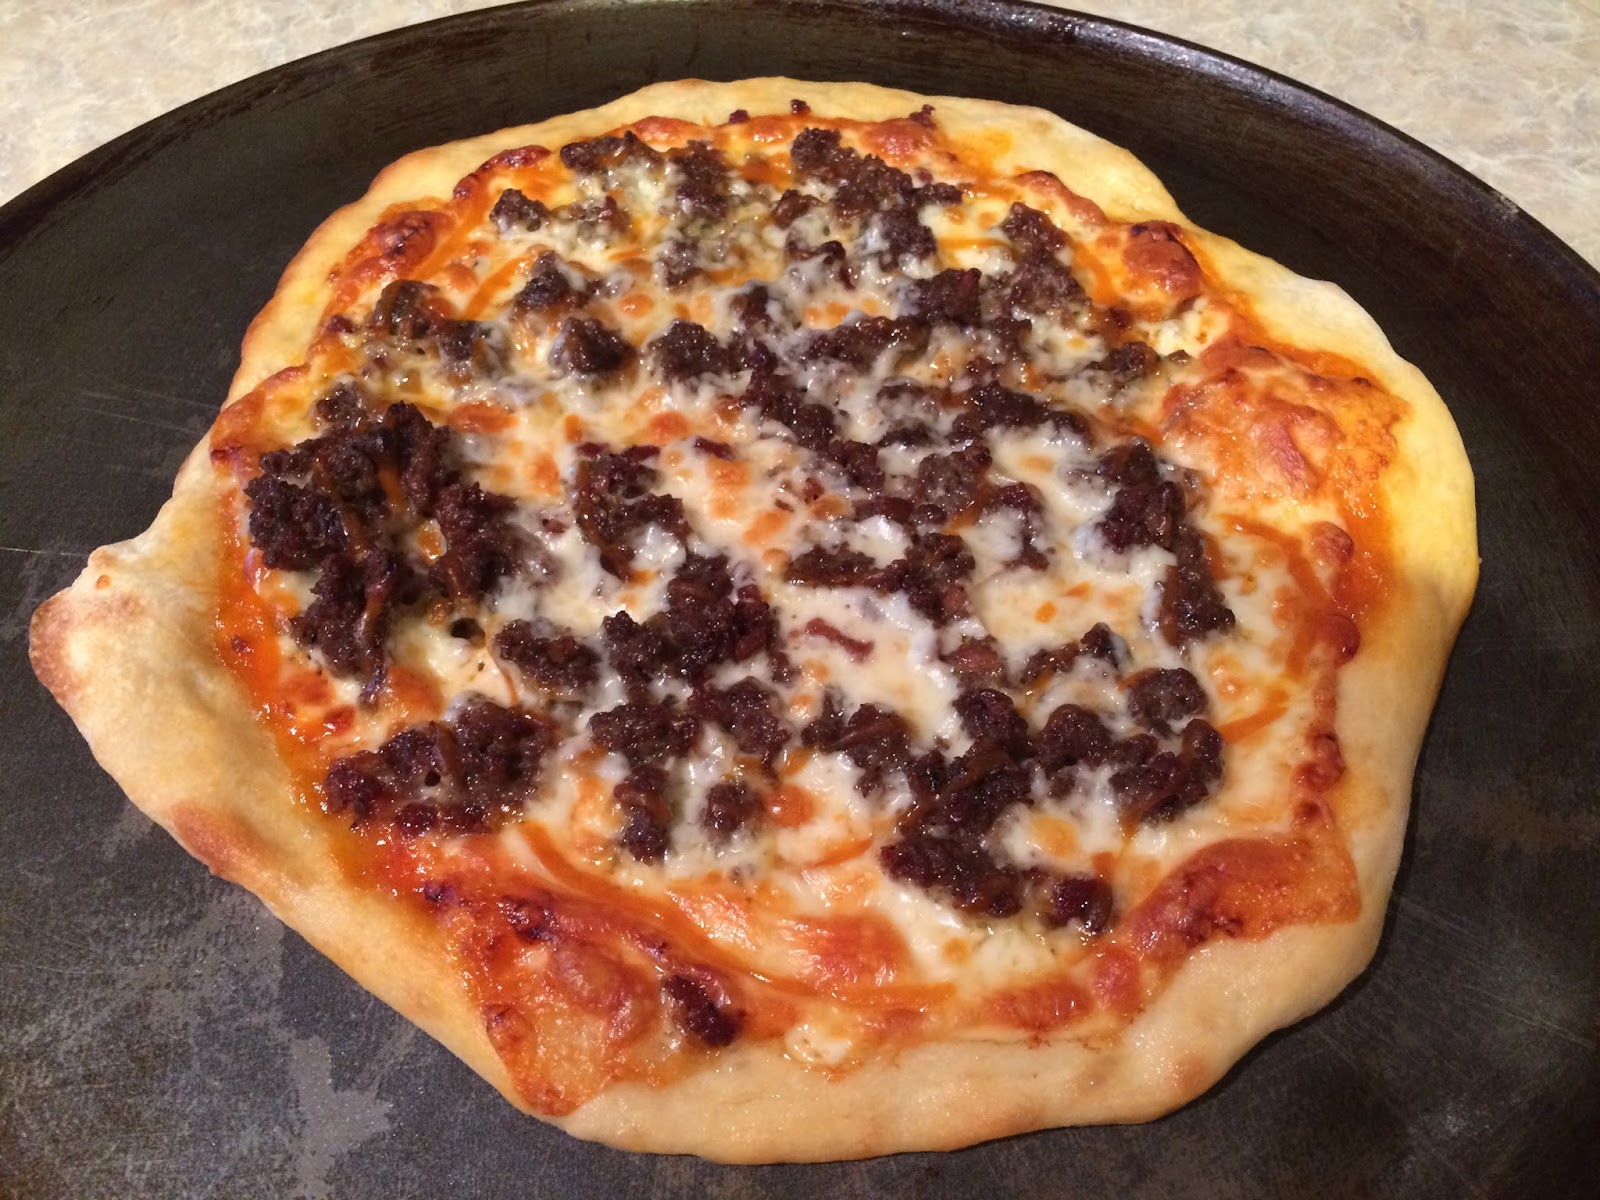
Cheeseburger Pizza
It
has been quite a while since I shared a recipe and for that I apologize. Life
has been crazy busy, which isn’t always a bad thing, but I finally have time to
share something delicious with you! Do you like cheeseburgers? Do you like
pizza? This recipe combines the two in a way that is simply delicious.
What
You’ll Need…
1
Pizza Crust
½
lb Ground Meat
6-10
Slices of Cheese (Your choice)
2
Tablespoons Mayonnaise
2
Tablespoons Ketchup
Tangy
BBQ Mustard (Or other mustard)
Pickles
(Optional)
Shredded
Lettuce (Optional)
Preheat
your oven to 450.
Start
out by cooking your ground meat. Once it is cooked set it aside to cool
slightly.
In
a small bowl combine the ketchup and mayonnaise.
If
you are using an uncooked pizza crust, which is the best option, stretch it to
the size you want for your pizza.
Spread
the mayonnaise and ketchup mixture evenly on the dough.
Top
the sauce with a layer of sliced cheese and tip that with an even layer of
ground meat.
Bake
at 450 for 12 minutes.
Before
slicing the pizza top it with a spiral of tangy BBQ, or other, mustard.
Slice
and serve!
Optional:
Shredded lettuce and pickles will add more of a cheeseburger taste and feel.
Enjoy!
Thursday, January 26, 2017
Cheesy Barbecue Chicken Pasta
If
you like barbecue chicken pizza you’ll definitely like this barbecue chicken
pasta!
What
You’ll Need…
4
Portions of Chicken (4 thighs, or 4 breast halves, or 2 breasts)
1lb
Pasta
¼
Cup Sour Cream
2
Cups Cheese
½
Cup Corn
2
Tablespoons – ¼ Cup BBQ Sauce (Your favorite)
Start
out by cooking your chicken and pasta.
Once
the chicken is cooked, set it aside for a few minutes to cool down so that you
can work with it. Once it is at a workable temperature cut it into bite-sized
pieces.
Drain
the pasta and add the sour cream and cheese. Stir or toss until the pasta is
coated.
Add
the chicken, corn and barbecue sauce to the pasta and toss to distribute it
all.
For
a little something extra, add chopped up crispy chicken skin over the top once
it is plated.
Enjoy!
Subscribe to:
Posts (Atom)